I got pretty artsy recently when Matt requested some plants for his new office.
I chose pencil cactus, some cuttings of an elongated variegated Opuntia (which turn pink in the sun) and a small low-growing fan Crassula. White gravel, blue sea glass pebbles, and some shells complete the look. I think it is just gorgeous.
Showing posts with label succulents. Show all posts
7.07.2013
5.30.2013
Moving outside
Every summer, I move most of my houseplants outside to soak up the sunshine, be refreshed by the rain, and generally thrive in the fresh air. Each year, I like to experiment with different set-ups for all my plants. Last year and the year before I primarily utilized a rickety (albeit good-looking) wooden plant rack, the year before that was metal shelves on the balcony, and even farther in the past they hung out on little tables I got at Target. Now that I have a yard, I rigged up the biggest, best shelving unit yet.
For about $1 each, I bought six "1/2 size" cinder blocks and Matt rustled up some old wood from the garage. Voila! a great-looking outdoor plant shelf. I made a Buddha face from concrete and will probably hang it above the plants. Look for that project in an upcoming post.
In other news, my silver squill bulb succulent is blooming. The teeny-tiny blossoms are so pretty--they have bright purple stamens inside the light green and white flowers.
The excitement over this plant spurred me to create this blog. In case you don't remember, check out my first post.
Anyway, my precious little euphorbia has performed like a champ. He went from a tiny cutting to growing his first leaf bract, then doubling in size in his first year, growing like crazy in the last two years and now... my baby is a parent! You may remember I chopped the head off the top of the plant, and as a result, the base section is now growing pups. The top part has yet to root, but it's still early and I have hope.
![]() |
| I decapitated him back in February |
![]() |
| The largest pup at the top of the plant is noticeably bigger everyday! The lighter green cutting in the pot was a hitchhiker in a plant I bought at the greenhouse ;) |
Another update to one of my plant babies is the "Obama cactus" which has grown about a 1/2 inch after being rooted back in November. Yay for Spring!!
4.13.2013
Not Spring, but Happy Anyway
Well, I thought putting up a spring wreath outside (see last post) would somehow remind mother nature that we need some frickin' sunshine and warmth, but it didn't work. Regardless, I'm continuing to think positive and did a doodle on my kitchen chalkboard.
Thinking positive also means buying new plants. Last weekend we stopped at Lowe's and I picked up a couple beauties.
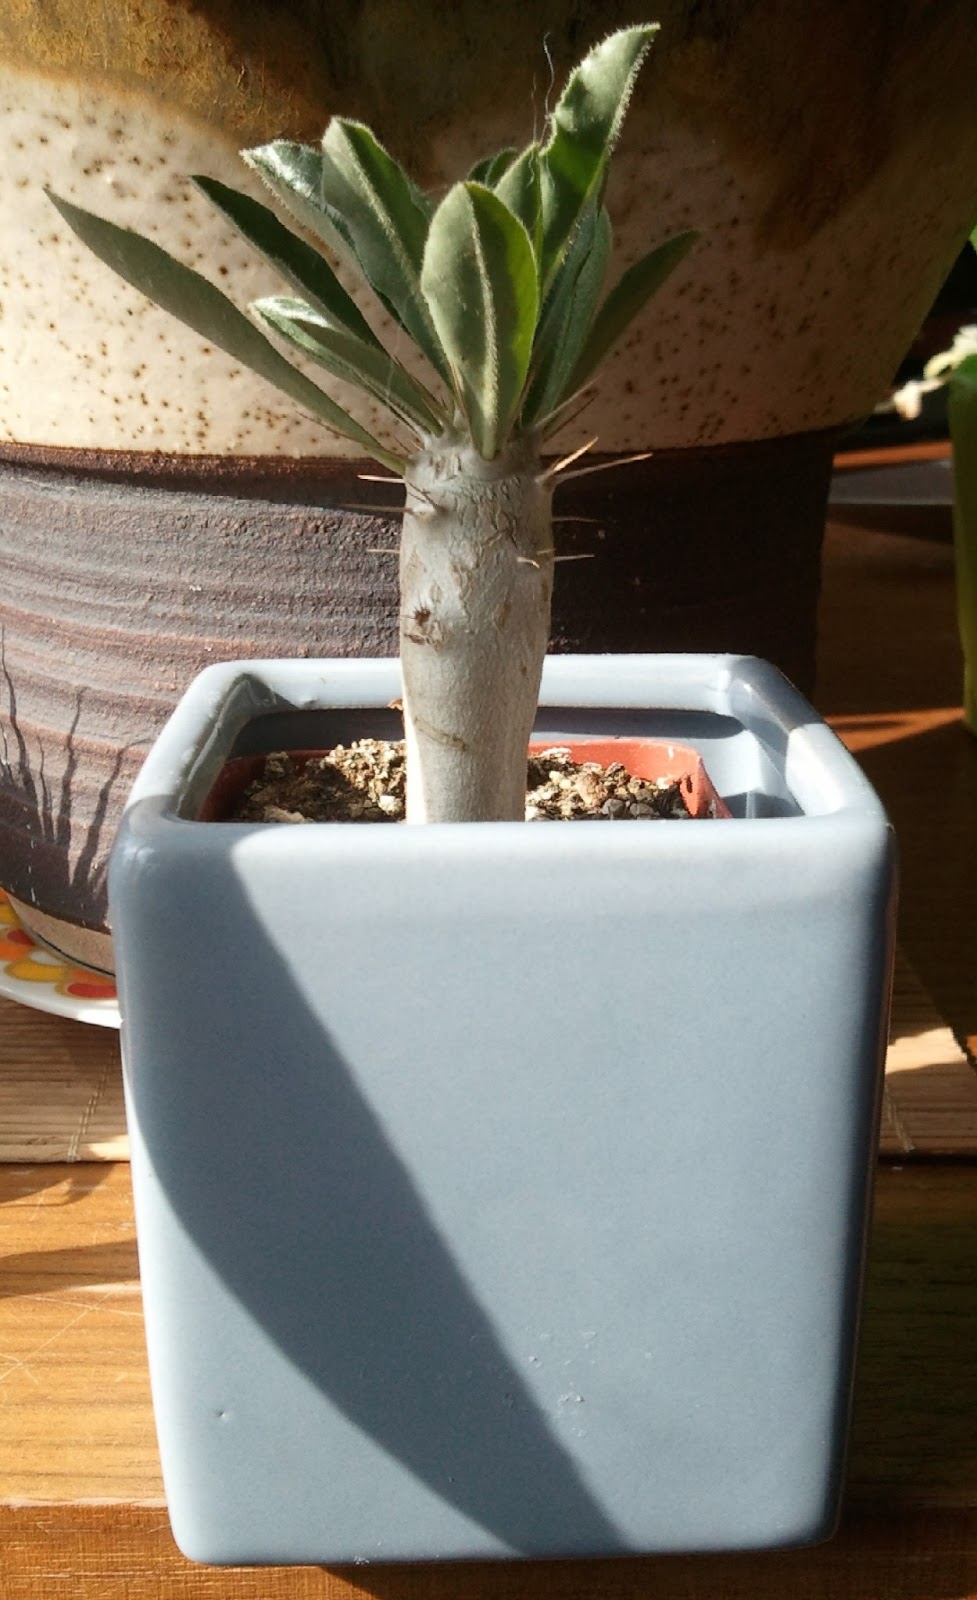
This may be an Adenium?
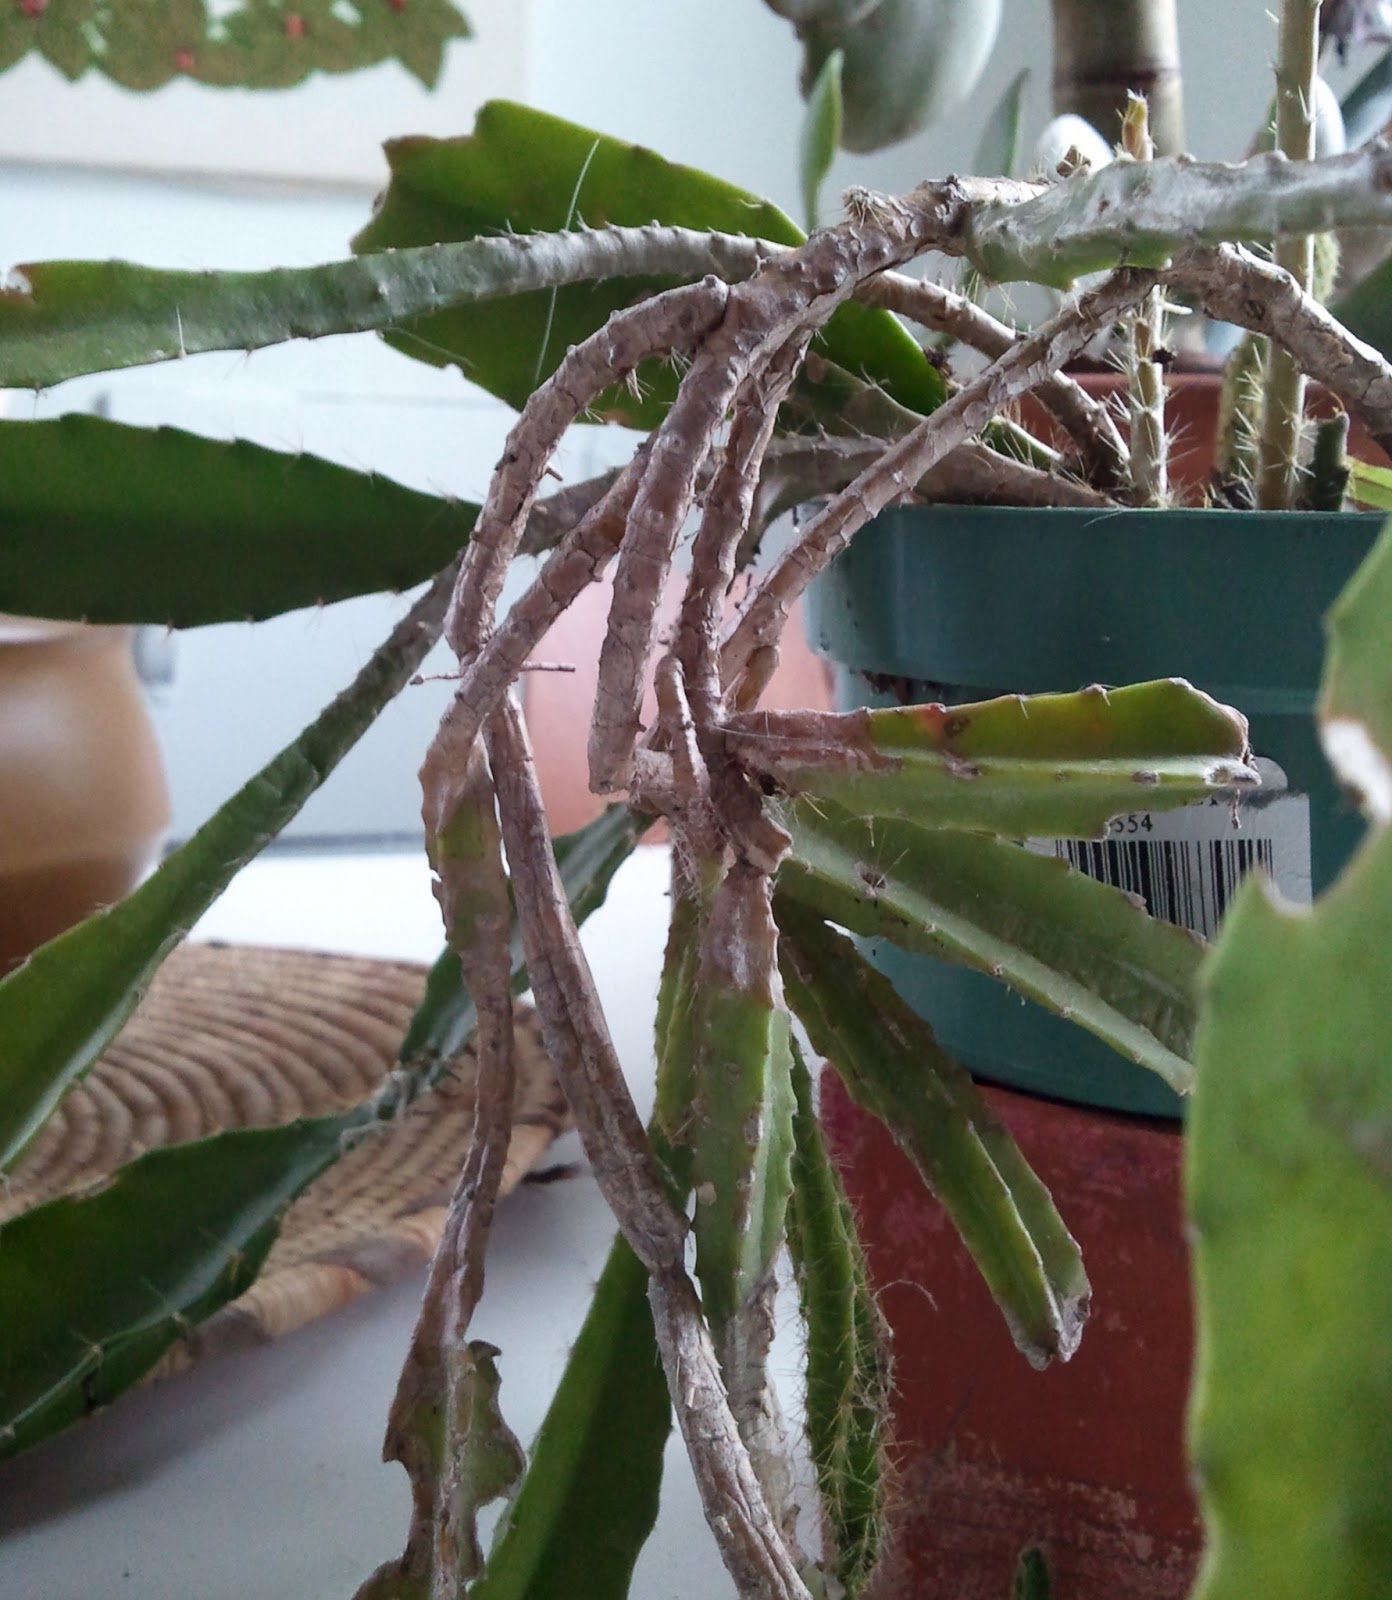
Rhipsalis "Mousetail" hanging basket. I have a beaded macrame hanger that will be perfect for this guy.
2.10.2013
Garden Expo 2013
Under the cover of being a new homeowner planning garden and landscaping this spring and summer, I attended the garden expo here in Madison. But the true reason I went was to hunt down succulents. Now, before you roll your eyes and call me a crazed obsessive-compulsive, I did learn about leaf mulch compost, garden borders and I bought two really cool art-metal trellises. However, my eye was constantly roving for my true loves and I was not disappointed.
I almost bought one of these purple/black beauties but held off until we had seen everything.
Firesticks. I can't believe I don't have one of these.
There was a whole bunch of really nice (and expensive) mini succulent gardens. Don't you love the carved stone owls?
While stopped in front of a booth selling siding or windows or driveway pavers, I happened to look down and see a little oasis of slightly sad-looking potted aloes. But I freaked when I noticed the Epiphyllum among them. The $4 price tag made the decision easy.
She needs a little TLC--some pruning, a re-pot and a good watering, but I couldn't be happier.
Check out the cool woody stems. It's probably a cutting off a much larger, old plant.
I almost bought one of these purple/black beauties but held off until we had seen everything.
Firesticks. I can't believe I don't have one of these.
There was a whole bunch of really nice (and expensive) mini succulent gardens. Don't you love the carved stone owls?
While stopped in front of a booth selling siding or windows or driveway pavers, I happened to look down and see a little oasis of slightly sad-looking potted aloes. But I freaked when I noticed the Epiphyllum among them. The $4 price tag made the decision easy.
She needs a little TLC--some pruning, a re-pot and a good watering, but I couldn't be happier.
Check out the cool woody stems. It's probably a cutting off a much larger, old plant.
2.05.2013
DECAPITATED!
My 3-year old Euphorbia Trigona cutting has been doing extremely well, growing over an inch taller just this last summer alone. However, it became obvious that the lower section was not growing and the plant was becoming top-heavy. So, nervously, I decided to cut off the robust growth at the top of the plant in hopes it will root and continue to grow, while the bottom part will sprout new off-shoots.
Here's my illustration of the situation:
I'm a nerd. Get over it.
I was pleasantly surprised to see healthy roots which had filled much of the pot.
Scalpel...

If you have the good fortune to own any of the varied and diverse members of the Euphorbia family, do be careful, as they will seep a white liquid if cut which can be irritating to the skin and toxic if ingested.
The bottom portion of the plant got repotted in a larger container with fresh soil. The top part will be left to dry and heal over before getting his own pot or joining his mother in her new pot.
Based on how fast this plant has grown in the last year, I am hoping he will look like this soon:
Here's my illustration of the situation:
I'm a nerd. Get over it.
I was pleasantly surprised to see healthy roots which had filled much of the pot.
Scalpel...

If you have the good fortune to own any of the varied and diverse members of the Euphorbia family, do be careful, as they will seep a white liquid if cut which can be irritating to the skin and toxic if ingested.
The bottom portion of the plant got repotted in a larger container with fresh soil. The top part will be left to dry and heal over before getting his own pot or joining his mother in her new pot.
Based on how fast this plant has grown in the last year, I am hoping he will look like this soon:
![]() |
| photo from here: http://onthewildslopes.tumblr.com/post/42213704895 |
1.24.2013
Plant Stuff
I got a head start on plant tinkering. I know it's the middle of winter and most my plants are in hibernation, blah blah...but the days are getting longer and I'm a glass-half-full kind of gal. To start, I divided up my spiny aloe (above). The thing grows in crazy clumps and thought it would look really beautiful by its lonesome. Mission accomplished.
I've been working at my Jade bonsai. This is probably my neatest, best-kept plant. For a long time, it was bushy with clumpy masses of leaves everywhere. After a serious pruning last summer and periodic plucking, it is looking quite beautiful.
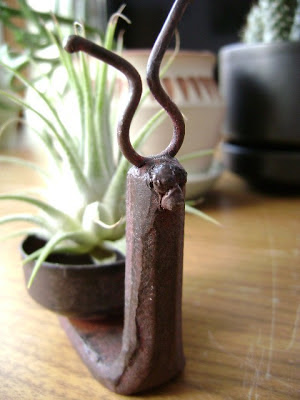
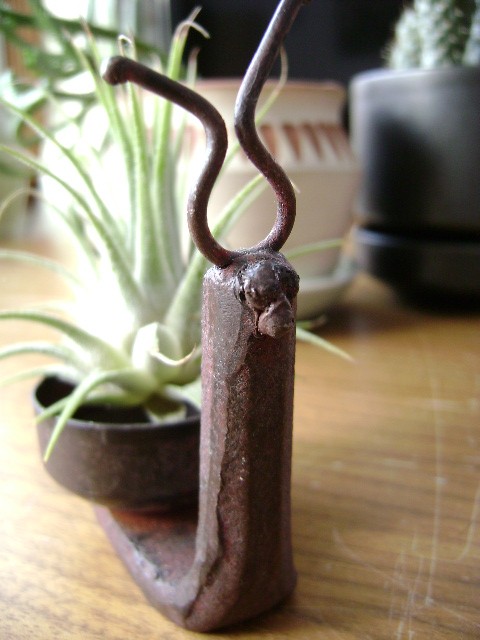
Instead of using my adorable metal snail votive holder for it's intended purpose, I stuck an air plant in him! In love.
My Etsy shop will be back up and running in the next week or so. Here's a teaser:
11.11.2012
Cactus cuttings 101
Crazy cactus lady strikes again!
Three years ago, I plucked a tiny euphorbia trigona stem from a gorgeous specimen in a catholic church (sinner!!) after my nephew was baptized. I couldn't help myself! Now that little cutting is 5" tall and on its way to greatness.
Last Tuesday while casting my ballot for Obama, I spotted a potted Opuntia Elata giving a valiant effort to thrive in a cramped corner (right next to the heat vent, poor thing) of the school library. I quietly wandered over to it and gently snapped off one of its larger pups. Stealing property from an official voting place? Probably illegal, but that's how hard-core I am.
It seems as though I know what I am doing in the stolen-cactus-cutting department, so here are some tips if you aren't exactly well versed in the subject, and want to grow some free plants.
First, let your cutting dry in a warm, bright spot where it won't be disturbed for at least 2 days and up to a week on a clean, dry surface like a towel. This will help the cut end heal over and give the plant the best chance to root.
Next, find or buy a small 2" terra cotta pot and place a scrap of paper (I like unbleached coffee filters or newspaper) over the hole in the bottom to prevent your soil mixture from leaking out.
For cacti and succulent cuttings, your soil mixture should consist of about 50% sandy gravel and 50% store-bought cactus potting mix. The gravel and sand will help improve drainage so the cutting does not rot, and the soil provides nutrients. If your mixture is very dry, lightly spritz it with water to moisten.
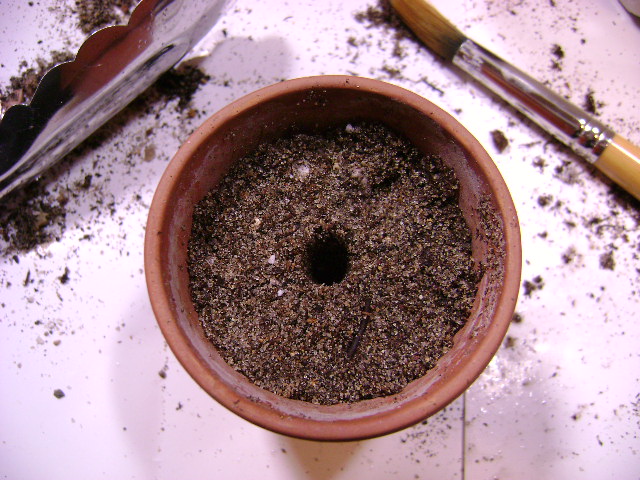
Lightly pack the mixture into your pot, leaving about 1/2" from the top. Using a wooden skewer or pencil, make a shallow hole big enough for the base of the cutting.

Place the cutting (cut side down) into the hole far enough
for it to stand up on its own, and fill in the hole with the
surrounding soil mix.
I like to use a fine gravel (found at any garden center) topdressing for my cuttings to help prop them up and wick away moisture from the base of the plant. If your soil mix is sufficiently moist, you can wait to water your cutting until a few days after to ensure it will not rot.

Place your new plant in a warm spot with sufficient natural light and it should root within a couple weeks. Don't be alarmed if the little guy starts to shrivel, he will plump up once his roots start to develop. My cactus cutting will be babied for the next 2-3 years, until I'm sure it is well-established and likes what I'm doing for it.
Three years ago, I plucked a tiny euphorbia trigona stem from a gorgeous specimen in a catholic church (sinner!!) after my nephew was baptized. I couldn't help myself! Now that little cutting is 5" tall and on its way to greatness.
Last Tuesday while casting my ballot for Obama, I spotted a potted Opuntia Elata giving a valiant effort to thrive in a cramped corner (right next to the heat vent, poor thing) of the school library. I quietly wandered over to it and gently snapped off one of its larger pups. Stealing property from an official voting place? Probably illegal, but that's how hard-core I am.
It seems as though I know what I am doing in the stolen-cactus-cutting department, so here are some tips if you aren't exactly well versed in the subject, and want to grow some free plants.
First, let your cutting dry in a warm, bright spot where it won't be disturbed for at least 2 days and up to a week on a clean, dry surface like a towel. This will help the cut end heal over and give the plant the best chance to root.
Next, find or buy a small 2" terra cotta pot and place a scrap of paper (I like unbleached coffee filters or newspaper) over the hole in the bottom to prevent your soil mixture from leaking out.
For cacti and succulent cuttings, your soil mixture should consist of about 50% sandy gravel and 50% store-bought cactus potting mix. The gravel and sand will help improve drainage so the cutting does not rot, and the soil provides nutrients. If your mixture is very dry, lightly spritz it with water to moisten.
Lightly pack the mixture into your pot, leaving about 1/2" from the top. Using a wooden skewer or pencil, make a shallow hole big enough for the base of the cutting.
Place the cutting (cut side down) into the hole far enough
for it to stand up on its own, and fill in the hole with the
surrounding soil mix.
I like to use a fine gravel (found at any garden center) topdressing for my cuttings to help prop them up and wick away moisture from the base of the plant. If your soil mix is sufficiently moist, you can wait to water your cutting until a few days after to ensure it will not rot.
Place your new plant in a warm spot with sufficient natural light and it should root within a couple weeks. Don't be alarmed if the little guy starts to shrivel, he will plump up once his roots start to develop. My cactus cutting will be babied for the next 2-3 years, until I'm sure it is well-established and likes what I'm doing for it.
10.27.2012
Grow!
Surveying my large plant collection, I got to thinking about the upcoming winter and the dismal lack of sunlight we get here in Wisconsin. It is apparent I do not have enough window real estate to satisfactorily sustain my brood. So, my next option seemed to be grow lights.
I got myself to Menards (our local home-improvement store) and bought two full-spectrum 60-Watt light bulbs and two clamp lamps and voila! grow light central. The beautiful shelves you see in the photo below were newly installed in my studio the day before.
I had two nifty wooden wine crates laying around which became the surface for the plants to sit on, and also holds such plant-growing necessities as watering cans, fertilizer, soil and gravel.
I think it looks like a lovely little oasis. I hope this helps my plants thrive a bit more over the long winter.
P.S. this is only a small fraction of my entire collection. So what? It's not a problem if you can admit to it...
I got myself to Menards (our local home-improvement store) and bought two full-spectrum 60-Watt light bulbs and two clamp lamps and voila! grow light central. The beautiful shelves you see in the photo below were newly installed in my studio the day before.
I had two nifty wooden wine crates laying around which became the surface for the plants to sit on, and also holds such plant-growing necessities as watering cans, fertilizer, soil and gravel.
I think it looks like a lovely little oasis. I hope this helps my plants thrive a bit more over the long winter.
P.S. this is only a small fraction of my entire collection. So what? It's not a problem if you can admit to it...
Subscribe to:
Posts (Atom)