Showing posts with label DIY. Show all posts

11.15.2013

Recovering the Klobo


The IKEA Klobo loveseat is a great little piece of furniture. We've had ours for over 5 years, and despite being clean and tidy folks, the white fabric inevitably picks up stains and spots, especially since we now have a dog (muddy paws!!). It was getting to the point that we had to do something--very embarrassing!

Quickly I realized upgrading to a new sofa was out of the question. A good budget-friendly solution turned out to be recovering the Klobo, as structurally it was still in great shape, it just looked disgusting. So I set out on a mission to find nice fabric for a nice price. I scored at Joann.com with a half-off coupon code. I bought 9 yards (turned out I could have gotten by with 8 but it would have been very close) for a grand total of $45. The hardest part of this undertaking was finding a fabric and at a price we both could agree on. Finally we found a lovely dark grey with a subtle printed texture.

The beauty of IKEA furniture is that they can be easily disassembled. I sewed the more fitted areas (the arms and back) and stapled everything to the underside, then put it all back together. Also, because the Klobo didn't have a whole lot of soft padding to begin with, I added a layer of memory foam (from an old mattress pad we weren't using) to the seat and arms and now it is SUPER comfy!!


To finish the whole thing off, I got a can of 3M Scotchgard protector for fabric/upholstery to help keep it looking nice even longer.
Does this qualify as an IKEA hack? Either way, we just got at least another good 2 years from our $99 loveseat!

I think these two approve. 


11.09.2013

Cuttin' a Rug

Happy news in the Matt&Bobbie family.....we are now puppy parents! Ok, we've had Zooey over 4 months now, but that's just how behind on this blog I am.
 She is a great dog--we love her so much!

In other news, I got restless with my current pillow collection and wanted to mix things up. In a momentary fit of insanity, I almost dropped $100 on three Turkish kilim pillow covers on Ebay. Not sure if Zooey is out of her chewing phase, I realized it would be crazy to spend that much.


 So, during one of my rare (wink) thrifting outtings, I came across a very large woven rug with some very interesting colors and shapes in it. The rug as a whole I did not like, but I could see at least a couple pillows being cut from it. So, for $5, I bought the beast and proceeded to chop it up.


I could not be happier. In the meantime, I have no idea what I am going to do with the other 90% of the rug, but that's what junk closets are for.

3.31.2013

Spring Craft

Dyeing Easter eggs is a fun craft I've enjoyed every year since I was a kid. At 28, why stop now? While perusing various craft blogs and pinterest, I came across Ombre dyed eggs. Ombre is a fancy color-graded (from light to dark) technique that has become very popular. And it turns out to be very easy to do with eggs.

First, prepare your food color egg dye with only 2-4 tablespoons of water (you want the color to be very concentrated to start with). Then carefully place your hard-boiled egg in the color. I used a small spoon to help keep it upright. Let the egg sit for 5 minutes, then pour in a little water to raise the level of liquid no more than 1/2 way up the side of the egg. Wait 2-3 minutes then add another dose of water. Continue until the egg is completely submerged, then take it out of the liquid after no more than a minute.


My next project aims to jazz up a plain planter.


 I found these fantastic plastic planters at Target. I grabbed a whole bunch of various sizes, knowing I could use them for re-potting my cacti and succulents.


I love the modern look of white, but this big pot begged for a little color. With some painter's tape and newspaper, I masked off all but a strip at the top of the pot, which I spray-painted a nice dark orange.


                                                                             Lovely!


To spruce up the front of the house, I fashioned this pretty, colorful and whimsical wreath, all with materials I had around the house.


                                                                      Put a bird on it!

2.25.2013

Design Dreaming

As you know, I have been trying to design and carry out plans for our upstairs and transform it into a warm and inviting master bedroom. I have a small chunk of the horrid pink walls painted a lovely sandy beige, but progress had been halted. Over the last week, we have purchased a beautiful bathroom vanity, uber-modern faucet, and white subway tile. I figured it is easiest to put up the wall tile before installing the vanity. After modifying the wall heating vent and ripping up a small portion of the floor, this bathroom project was clearly becoming a big one. But I'm thrilled and excited and motivated.

With this ever-expanding bathroom project, the upstairs plans have been put on hold. But I am eager as ever to tackle it. Here are my ideas:

image from: freshome.com
This is color and feel I'm going for with the wood ceiling. 
While at our local home improvement store, I scoped out the laminate flooring options for the ceiling. There is major square footage to cover, so budget is very important. I found a medium-tone (not too dark) highly variegated option for like $1.50 per square foot.  
Image from: the-brick-house.com
The only lighting we have upstairs is a tiny wall sconce at the top of the stairs. For some romance and drama I want this sexy beast hanging above the stairs. 


I OWN YOU!!!! Yes, I have had my heart set on this rug from World Market for several weeks. Last weekend was a 1/2 off sale so I splurged and it arrived Friday. I absolutely love it and I think it will provide a nice stepping-off point for the design of the rest of the room. Oh, and I think I got one of the last ones because it is no longer available online. I rule. 

image from: krrb.com

Ikea always has a way of elbowing in any budget-conscious home update. A simple, modern, low Malm bed would be perfect for our bedroom. They have a great new color option too: a medium walnut with a more prominent grain.


One of the last projects will be a divider to separate the closet area from the sleeping area. I really like this wood slat number, and it would be an easy DIY. Unlike these folding screens, I would do a permanent built-in screen, as we have sloping ceilings and a brick chimney smack in the middle. I like the slats because it would let light through from the window on the other side.

We're talking a lot of wood (part of the floor will also be wood/laminate or cork) warm colors and texture. With all the ideas and long wishlist I have, we may very well be still working on this next winter. 

1.05.2013

New Year, New Projects

 I've been terrible about keeping up with my blog--apologies and excuses. Anyway, as much as Matt and I have accomplished on our house (see past posts) there's more! Our priority has been getting the living areas livable and saving the upstairs master bedroom for this very moment. Exciting, I know. 


 We've broken the project down in 3 parts. 3 parts in 3 months. Sounds do-able. First is to paint. Call me crazy, but the pink is quite ugly. We've chosen a nice earth-tone which will be a welcome change to the all-white downstairs. 


Part 2 will be to remove the horrid ceiling tiles and replace them with some type of wood. We'll know when we see it, but I'm thinking some kind of salvaged hardwood. We're going for a very warm, architectural- modern feel. 


Finally, if all goes to plan, new flooring will go in. 2/3 of the large room will serve as sleeping and closet area while the front 1/3 will be a place for low book cases and a reading nook. We will delineate these spaces with a low-pile carpet in the bedroom area and a cork or hardwood in the lounge area. 

Last will be finishing touches like putting in baseboards, trim around the windows and something to separate the closet from the bedroom, like a Shoji screen or more bookcases. 


The area to the right of the chimney will serve as a spacious
walk-in closet.


I almost forgot the chimney. After painting and before doing the ceiling, we have plans to knock off the drywall covering the chimney to expose the brick underneath. Why cover real brick with fake, I will never understand. Depending on what it looks like, I'd like to paint the brick white. What? I love white. 

Overall, I expect the upstairs to be fairly easy compared to the rest of the house. We don't have floors to refinish, endless hours of paining, and disgusting messes to clean up. Just installing NEW stuff. 

Ok, that was a lot of ugly you had to look at. Here are some nice things to soothe your eyeballs.


This may be my favorite little corner of the house. I have two epiphitic cacti hanging
in a bright window over the kitchen table along with our perfect pendant lamp
and my beloved "yarn painting"
The kitchen cabinets look amazing with my DIY handles. 
Eames chair deserves its own nook
I've discovered that hanging a small textile on the sides of
our Ikea Expedit bookcases adds so much warmth and texture
to the whole thing. 


I found this hand-woven trivet at a thrift store (shocking, I know). It adds
nice visual interest above the sink. 


10.27.2012

Grow!

Surveying my large plant collection, I got to thinking about the upcoming winter and the dismal lack of sunlight we get here in Wisconsin. It is apparent I do not have enough window real estate to satisfactorily sustain my brood. So, my next option seemed to be grow lights. 


I got myself to Menards (our local home-improvement store) and bought two full-spectrum 60-Watt light bulbs and two clamp lamps and voila! grow light central. The beautiful shelves you see in the photo below were newly installed in my studio the day before.  


I had two nifty wooden wine crates laying around which became the surface for the plants to sit on, and also holds such plant-growing necessities as watering cans, fertilizer, soil and gravel. 


I think it looks like a lovely little oasis. I hope this helps my plants thrive a bit more over the long winter. 
P.S. this is only a small fraction of my entire collection. So what? It's not a problem if you can admit to it...

9.12.2012

Matt and Bobbie's House::::::: Part 2:::::::


BEFORE: the living room wasn't in real dire need of rehab, but the sloppy paint job, dirty & rusted vents, pheasant and evergreen light switch covers, and old front door begged for some love. 

 We had new doors and windows installed throughout the house which helped matters immensely. Some nice bright white paint freshened things up and we spray-painted all the vents. 

Is this the same place? Hard to believe, I know. The hardwood floors through the whole house were worn and dirty. Step one was to rent a floor cleaner (a small version of what janitors use on gym floors) with a scrubbing pad and along with some hot water and special cleaner, we got these babies clean in one day. 

Step two was to sand lightly with a small hand-held power sander to even out the surface and remove superficial marks and scratches. We could have used a large floor sander, but didn't want to ruin the floors since we hardly knew what we were doing. 

Step three: apply one even coat of Golden Pecan Minwax stain. I was amazed by how the stain brought out the character in the wood and just made it glow. 

Once the stain was completely dry (I waited 24 hours to be sure) two coats of polyurethane went on to seal and protect and give even more silky glow and gorgeousness. 


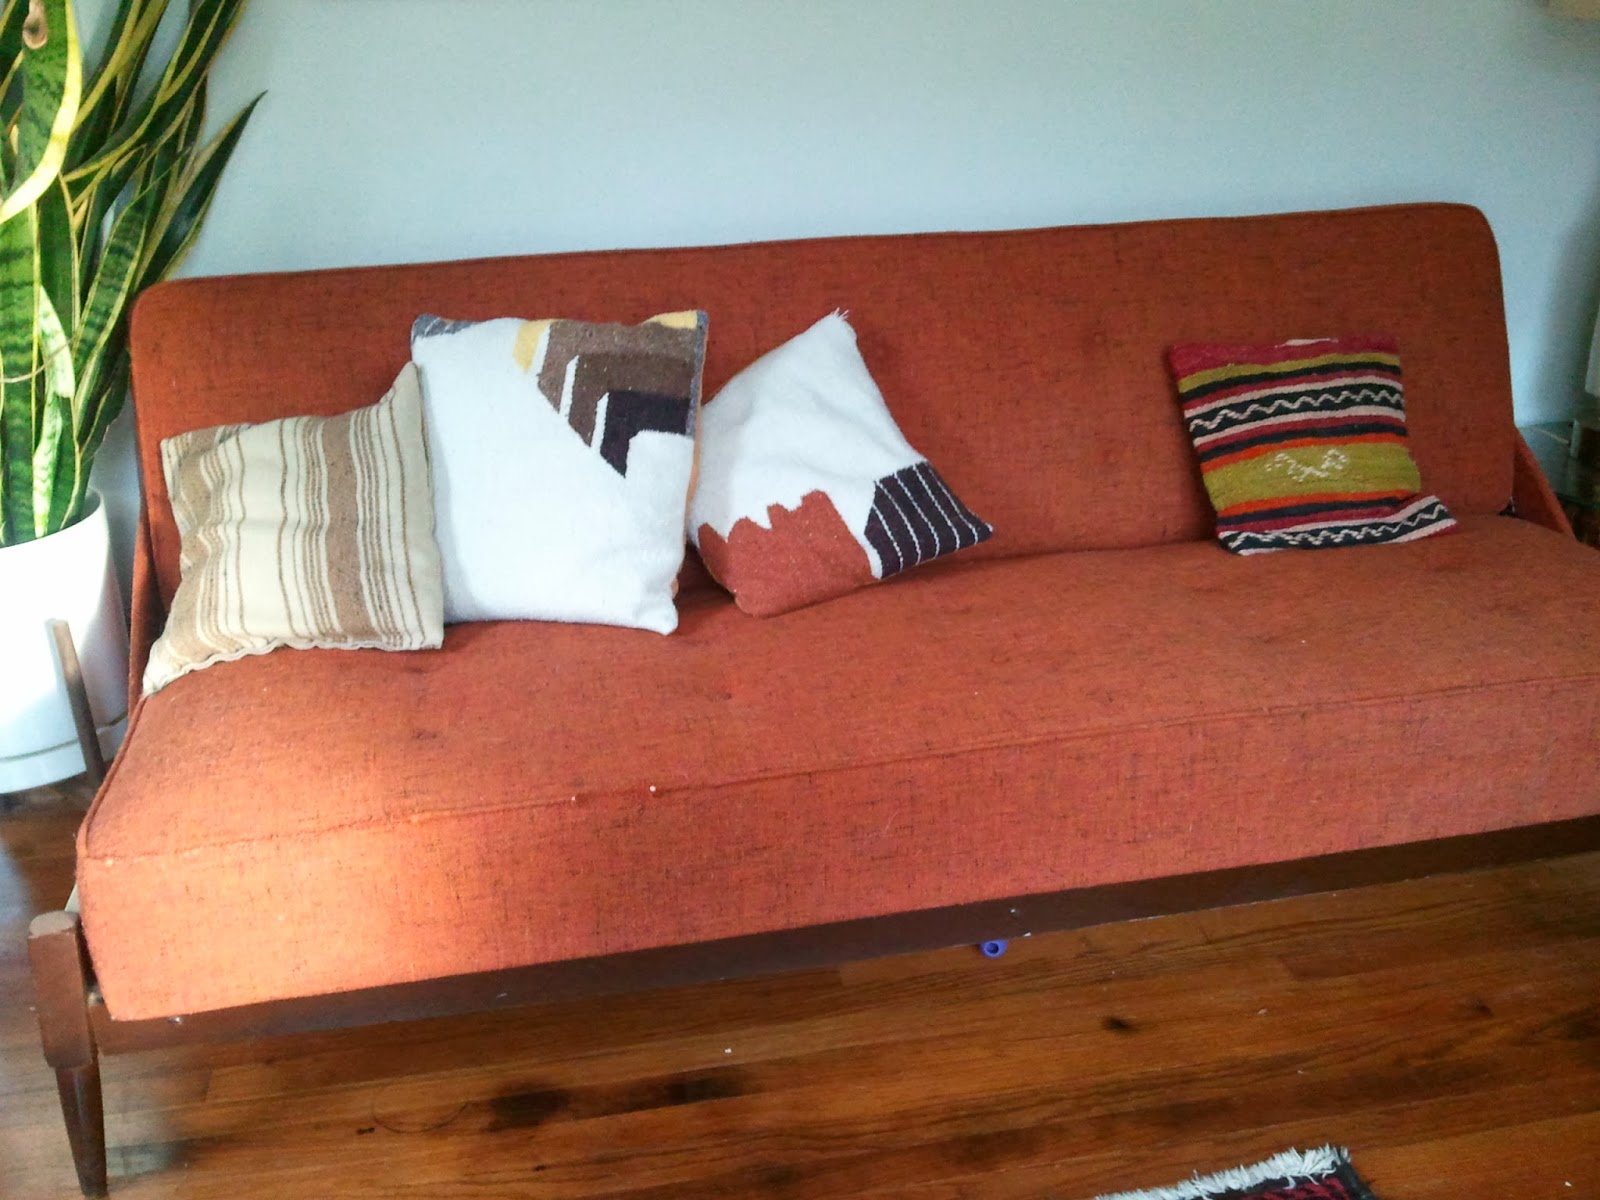
Hmmm...I don't remember that sofa from before. That's because I just bought it! Yes, it hung 3 feet out the back of the Jeep, tied in with 10 feet of rope but I would have carried it on my back if I had to. For $100 at the thrift store, it is exactly what I have dreamed of finding for our new house. It had some ugly brown wood arms but a quick swipe with my jigsaw and they were adios. Hello, gorgeous. 

 Our Expedit now serves as room divider so the front door is not as visible from the living area. 


 The once-pink guest room now looks fresh and delicious. There are still lots of things to unpack, including art, so the pretty white walls remain blank. 


This is the air return vent in the hallway. Completely coated in a thick layer of dust. Enter ShopVac and spray paint. Fixed. 


I will be sharing more as we get more done and continue to have fun with our home. There is an entire upstairs we have grand plans for, as well as the bathroom and my studio. 

I would be remiss not to mention and thank those who have been generous with their time and helped us immensely. My sister put it several solid weekend's worth of work getting a lot of painting done (which I soon grew too tired of), along with my mom who labored over the filthy bathroom floor and in the yard chopping down a forest's worth of weed trees. My amazing in- laws have been more than generous working on anything and everything we needed help with, as well as a much-appreciated shopping spree at Menards.  We are so lucky to have our amazing family. Love you guys, and "thanks" is never enough!!

Matt and Bobbie's House

What an adventure the last 3 months have been. We now inhabit our very own home! It's an amazing feeling and I can't believe everything we've done to get to this point... The house hunt began early this spring and after looking at numerous foreclosures with crumbling foundations in questionable neighborhoods, we found our gem. She met every point on our wishlist: 3 bedrooms, charm & character, small yard, basement & garage, hardwood floors with lots of windows in a great area of town. We quickly put an offer in and soon after it was accepted. Then the hard part came. We spent weeks and weeks dealing with our lender getting through the rigmarole and red tape of a renovation loan on top of a first-time home buyer's mortgage. So, after pushing the closing date back about 3 times (and having the seller threaten to pull out of the deal), we finally got the keys. 

The house has great solid bones, but needed a lot of updating and TLC. Let's start with the kitchen, shall we? 


BEFORE: Lots and lots of very badly applied yellow paint. 

 The cabinets are Harrison metal cabinets, most likely original to the house c. 1950. What ever will I do with these....? Stay tuned. 

 One thing we quite liked was the faux brick back-splash behind the sink. 


 But it needed some help. 


More yellow in the dining area.The windows were also very decrepit and barely opened. Note the cute milk door which we will keep as a nod to the era the house was built. 


I originally wanted to take down all the cabinets and put up some simple open shelves. Matt talked me out of it, and so began the long arduous task of making over the lovely rusted, filthy metal cupboards and doors. 


Choosing the paint colors early on gave me the motivation to see this project through.

 Like I said, these babies were disgusting. That is indeed rust you see beneath the sink, and I was even lucky enough to find some mouse poop in one of the drawers. 


Dinner party, anyone?

 I spent hours and hours scrubbing, priming and painting the cabinets. We did take down one section to make room for the stove and fridge (not pictured) which saved me a good bit of work. 

Once clean and after a light sanding, I primed the drawers, doors and cabinets with KILZ spray primer, putting an extra coat on the super-nasty parts. I decided to paint just the very front of the drawers and doors with my funky colors of enamel matte-finish paint, to give them a more modern look. 


We love this utilitarian metal shelving (I used a lot of it in my art studio at the apartment) easily purchased at Home Depot or Target. This will serve as some extra storage & counter space and will eventually sport butcher block once we venture to Ikea. I am also looking forward to hanging open shelving above to display our coffee cup collection and other attractive kitchen kitchery. 

Wow! All that sweat and elbow grease was so worth it! The colors are so lively and cheerful, yet modern and Dwell-worthy. I still have DIY cabinet pulls to install (you can get a glimpse of them on the drawers to the right in the photo above). 
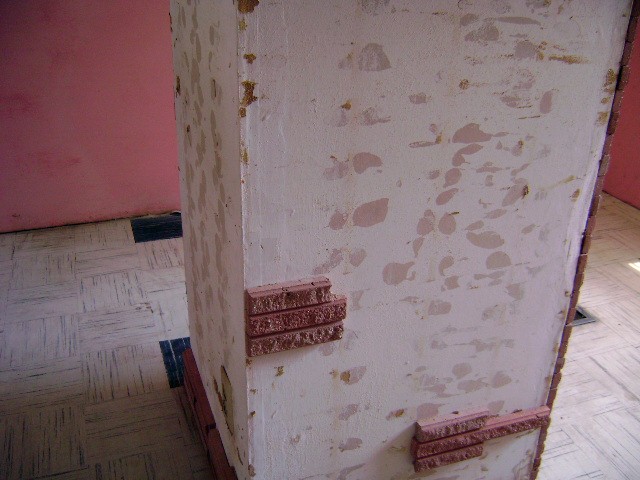
To rehab the back-splash, we simply replaced the broken and missing bricks (there was a whole box of them in the attic), painted the same white as the walls, and caulked the gaps and cracks to give it a finished look. 


The little eat-in area in the kitchen is the perfect size for our table. I like that it butts up to the window, as my plants get great morning light here. 

Still to do in the kitchen: 
* Get new counter tops (butcher block from Ikea)
* New faucet
* New flooring (possibly the new peel-n-stick tiles that can be grouted) 
* Window treatments (natural woven bamboo blinds)
* Garbage disposal 
* Hang open shelves

...And that's just the kitchen! Luckily, the rest of the house wasn't in such bad shape, so we'll cover that in the next post. That's all for now, I'm off to enjoy my house!